Easy Peasy Blackberry Jam

Close up B and Apples

I love jam; it’s really very simple. I love it’s fruitiness, stickiness and downright jamminess and I want to make it myself. I have the fruit trees in the garden and I have the recipies so it should be child’s play shouldn’t it? Well, Quite Frankly No It’s Not. I’ve lost count of my many jam disasters; the burnt saucepan left out on the wood chopping block after attempting greengage jam to which even the chocolate Labrador raised an eyebrow. Then there was the burnt grapefruit marmalade…. I thought I might be able to save it by adding to a marmalade cake. I offered a piece to Mr Fig who chewed it thoughtfully and proclaimed that he couldn’t quite put his finger on it… “…that’ll be the brunt grapefruit.” I said…. cue loud guffaws of laughter. This can’t go on so I decided to take matters into my own hands and travelled 12,000 miles to England where I knew of a Jam expert who’d been making delicious jams for years aka my Mum. We gathered some blackberries from my sister’s allotment and a couple of apples and set to work. Here are my top tips for a Fool’s Guide to making jam that doesn’t burn!!!

Blackberry and Apple Jam
Cooking time 35-40 minutes Makes 1.5kg jam

450g Blackberries
450g cooking apples (weight when peeled and cored)
2 tablespoons water
900g sugar

add Blackberries

Wash the blackberries and allow to drain well.

Cut up apples

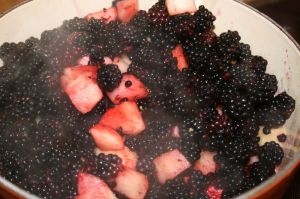
Chop the apples and put in the preserving pan with the water and simmer gently for 10 minutes.

A and B in pan

Add the luscious blackberries and continue to cook SLOWLY. You’re looking to achieve a soft puree as the fruit softens and the fruit juices ooze out.

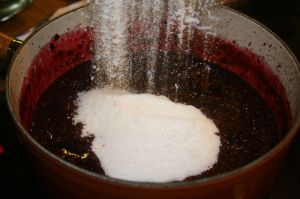
Add sugar

Now it’s time to add the sugar which is where it all used to go wrong for me. It’s imperative that you dissolve the sugar completely so it won’t catch on the bottom of the saucepan when you start to boil. Just keep gently stirring until there’s no grittiness to the liquid.

Turning to puree

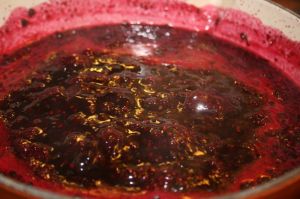
At this point turn up the heat and start to boil. Watch out for bits of flying fruit and juice as this is a feisty little jam! I used to let my jam just boil away merrily unattended but my Mum prods and pokes with a wooden spoon checking it all the time.

Rolling Boil

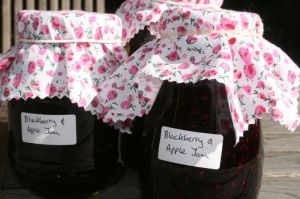
Once we got to about 7 minutes of boiling we began to test for setting point. Just spoon a little onto a saucer and if it wrinkles when you prod it then setting point has been reached. I used to fuss and sigh over whether it was a wrinkle or just a pucker or crease and would boil some more just to be sure….But I will fuss no more! Simply pour the jam into sterilised jam jars and seal with lids.

Jam 1 Jam 2

Looks good doesn’t it and it tastes sublime! It does seem so simple now I’ve seen it done. I can’t wait to get back and Try Again with the first fruit of the season – plums. I’m also desperate to try greengage jam again and will be using this great recipe from My Home Makes

Close up Blackberries

The Garden Share Collective September

Spring is definitely in the air in my garden! This is perhaps the most perfect time of year; I can wonder around my garden admiring the luscious new growth, the colours, the scents and the possibilities without actually having to do any work!! As soon as I sow my first seed of the season the honeymoon is over so I relish this time enormously.

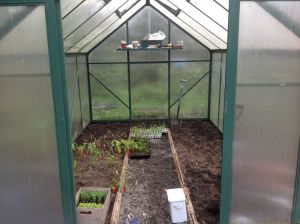
I promised to tidy out the greenhouse this month; it was pretty neglected and needed some attention to be ready for Spring.  I love a Before and After shot so here is my Greenhouse after it’s makeover.

Greenhouse Before  Greenhouse After

All ready to be filled with little seedlings!

One of my tasks from last month was to plant up the Pimms bed and I have indeed planted up the strawberries and found some borage seedlings and re-positioned. The canes in the middle will be tied at the top to make a wig wam for the mini white cucumbers that I’m going to sow. I’ll also slot in some spinach strawberries (can’t wait to see what they taste like!) and some mint. I found some tiny alpine strawberries when I was weeding and am tempted to transplant some of these too.

Pimms Bed

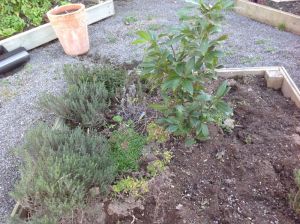
My vague musings about creating a Cup of Tea bed have started to take shape….

Cup of Tea Bed

…doesn’t look much at the moment but I added the Bay Tree this week after reading about a Lemon and Bay Tisane on this lovely blog. My bay tree was just plonked by the honeysuckle arch and wasn’t getting much sun so a re-positioning was ideal. I’ll remove the rather tired looking thymes and replace with Anise Hyssop, Bergamot Bee Balm, Chamomile, Fennel, Lemon balm and Lemon grass and Penny royal. Looking forward to a bit of Tea Experimenting Action!

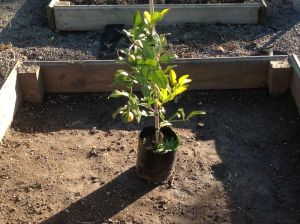
I have a third square bed that was crying out for attention so this will now be a Spice Bed (I’m really getting into these Themes; it’s like Gardener’s World meets Disneyland!!). Here it is now with a Kaffir Lime waiting patiently to be planted…..

Spice Bed

…..and soon it will be planted up with cumin, black cumin, caraway, lemon grass, dill, fennel and anise. My basil will be planted amongst the toms this year and very happy it will be too.

I was worried that my garlic had been pulled out by the pukekoes in the orchard but look….

Garlic

…perhaps they were put off by my own little pukeko family! My microgreens are growing albeit Very Slowly but here they are…

Micro greens

…and look at my gorgeous Plum Tree pickled with blossom!

Plum Tree

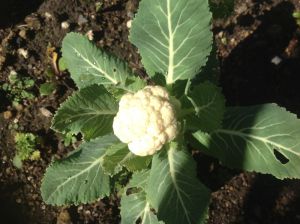
And look what I found today nestling in the winter veg bed…..

Caullie

…the cutest little mini caullie ever!

All very exciting but I’ve saved the best to last. For those of you that have read my one and only fig post you’ll know I am about to plant up a fig orchard. I have 500 little figlets that I grew from cuttings sitting in little bags waiting to stretch their roots out in the paddock. Look what I found today….

First Fig

….the first little figlet awake from his winter slumber. Looking forward to sharing my Fig Journey with you all.

Jobs to be tackled

My main priority will be to sow all the seeds that I need for my new themed beds and all the other veg and flowers that I want to grow this year. I always get a bit over excited when we get a hint of warm weather because I know we’ll get a cold snap so I’m holding off for a bit and of course cleaning out all my seed trays in preparation (!)

Keep piling up the compost bin.

Set up the wire towers for my ‘King of the Blues’ runner beans to climb up

Add more sheep pellets to the beds and dig over